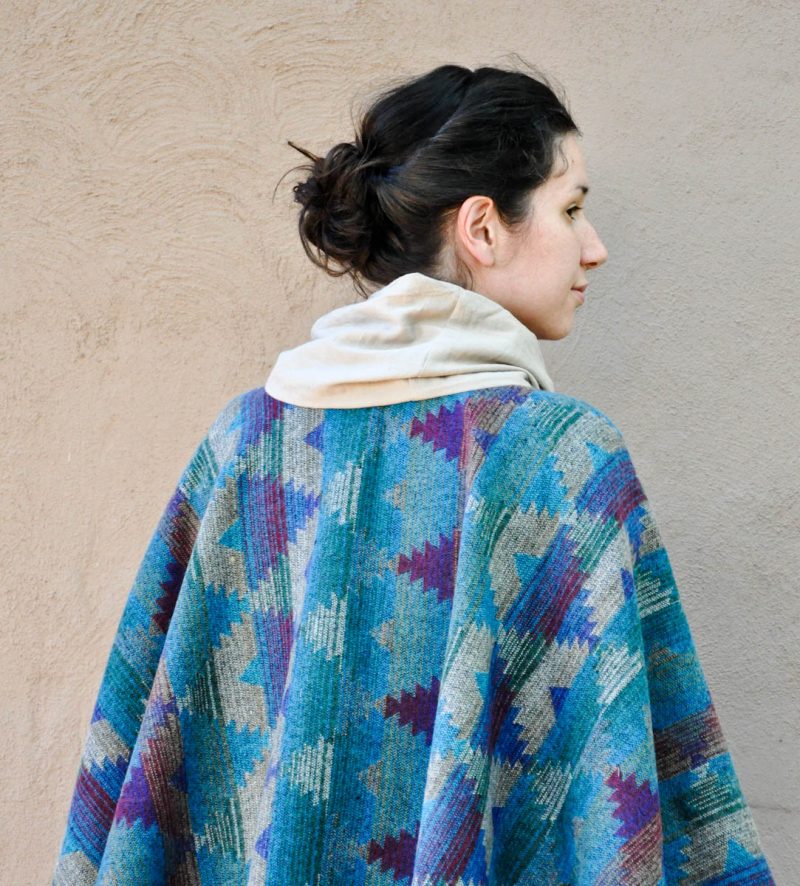
Is anyone else out there so ready for summer to go on its hot, muggy way and for it to cool down, so we can wear all these cozy sweaters that keep popping up on my Pinterest wall? I thought maybe if I started making some fall/winter projects that I could at least pretend like the season was changing, so I made the warmest, coziest thing I could think of: a crop poncho with a cowl neck!

Ponchos are such a great idea. I mean, seriously, what’s not awesome about a blanket that you wear anywhere and looks stylish all at the same time!

This poncho is a great project for any beginner who wants to make a garment. All you have to do is fold, measure, cut and sew! The main part of my poncho is not actually wool, it is acrylic apparel fabric from Joann’s , and the cowl neck is double gauze. You can use the same fabric for both the neck and poncho if you like, but I wanted to have a softer, less scratchy fabric close to my neck. Think about all the great combinations of fabric you could use… Have you seen all the beautiful southwestern patterns out there?
To make a poncho for yourself or a friend, follow the instructions below!


You will need:
1.5 yards of 54″ wide fabric for the poncho
a rectangle that measure 28″ long by 14″ wide for the cowl neck
coordinating thread
For the main part of the poncho, you will want to use a heavyweight, warm fabric: wool, wool blend or fleece
For the cowl neck, use something that will feel nice against your skin and not scratchy: fleece, double gauze or a lighter knit than what you used for the poncho.
Instructions:
Before you start to cut and sew, it is always a good idea to prewash your fabrics to prevent any unwanted shrinking and pulls along your seams.
Step 1: Fold your poncho in half across the length and then fold it in half again along the width, so the fabric is now folded into a fourth of its size.
Step 2. You need to measure and mark your curve. Starting in the folded corner, measure out and mark at 26.5 inches. The more markings you make, the easier it will be to draw out your curve. If you are using a darker fabric, you can use tailor’s chalk or washi tape to make your marks.


Step 3: Cut out your curve by following the markings you made.
Step 4: Cut out a hole for your head and neck to go through. Print and cut out the neckline template and place your template in the folded corner (very center of your poncho). Cut out your neckline along the curved edge. Make sure to cut through all four layers of fabric.


Step 5: Attach the cowl neck. With right sides together, sew the short ends of your rectangle together, so you now have a tube of fabric that is 14 inches tall. Fold the tube of fabric in half with the raw edges (from the seam you just finished sewing) hidden on the inside. Your tube should be 7 inches tall now.
Step 6: With right sides together and raw edges together, pin your cowl neck to the neck opening on your poncho. Pin the two together at the sides first, then place another pin in between those two and continue until you have the neck opening pinned in at least 8 places. If you are using two different fabrics for the poncho and cowl neck, one of your fabrics might have more of stretch, which will make it likely to shift more as you sew the neck opening. The more you pins you use to hold the cowl neck to the poncho, the easier it will be to sew them together, especially since you are sewing along a curve.


Step 7: Finish the raw edges along the neck opening. You can serge them or used a zig zag stitch.
Step 8: Finish the hem of your poncho. I serged along the entire edge of my hem and left it just like that. You can serge and then fold it under 1/2 inch and sew it down if you wish. You can even zig zag the bottom edge and then tuck it under to sew if you do not have a serger.
Turn your poncho right side out and enjoy how cozy it feels! Here in Georgia, I will have to wait another month (or two) before I get to wear mine. Just when we think summer is over, it surprises us with another heat wave, and I have to go digging for my shorts again!

If you liked this tutorial, here are a few other projects you might enjoy!


